Problem
How do I enable DKIM signing of emails through outMail?
Solution
In this knowledgebase article we will cover
- the setting up of a DKIM record
- The necessary DNS changes required
- Verifying the DKIM key
It is assumed you have an outMail service and that you are already able to send emails via the outMail gateway.
1) Log into the managment portal - https://portal.my-engine.com
2) Using the left hand menu select Outmail -> Domain Keys (DKIM)
3) You will now see the Domain Keys (DKIM) page
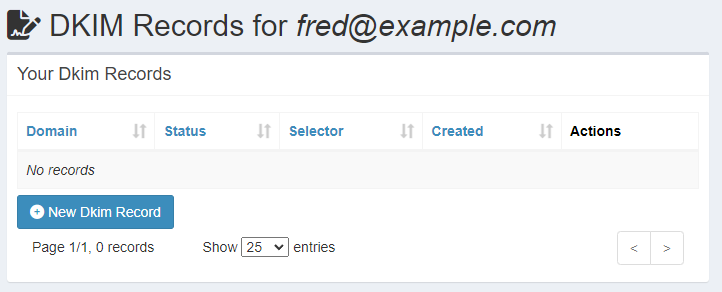
4) Click on the button "New Dkim Record"
![]()
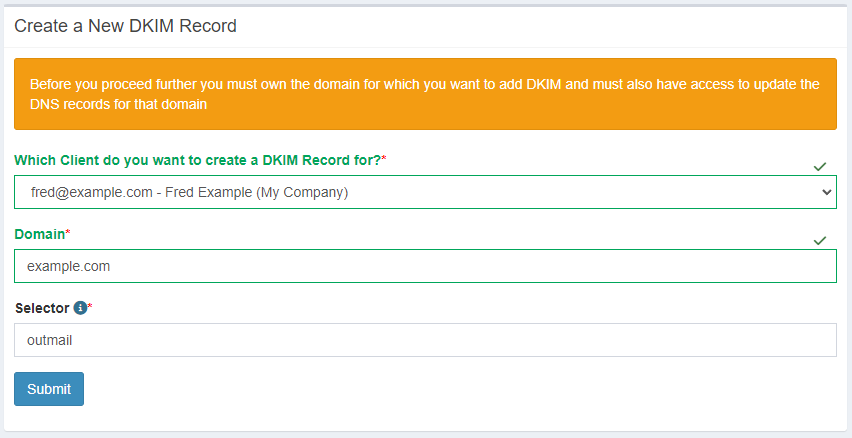
5) Enter the domain name for which you want dkim signing configured. Note, this is the domain name from which you are sending emails. In this knowledgebase article the outMail service is being used for fred@example.com so the domain will be example.com. If your outMail service is being used for multiple domains then you will need to repeat this knowledgebase article for each of the domains you want DKIM signing for.
At this point you can change the selector name for the DKIM record. By default the selector is named "outmail" however if you want multiple DKIM selectors then you can change this to something else.
6) At this point the portal "may" ask you to verify your domain name. Note, if you have previously verified the domain name for a different service then it might skip this stage.
However, in this article we'll assume this is the first time and will proceed with domain ownership verification.
You will now need to log into the portal of whoever manages your domain. Once logged in then you need to create a TXT record with the details from the screen.
e.g.
@ TXT "myengine=fb124567ede61fa59eda749b175fa76c"
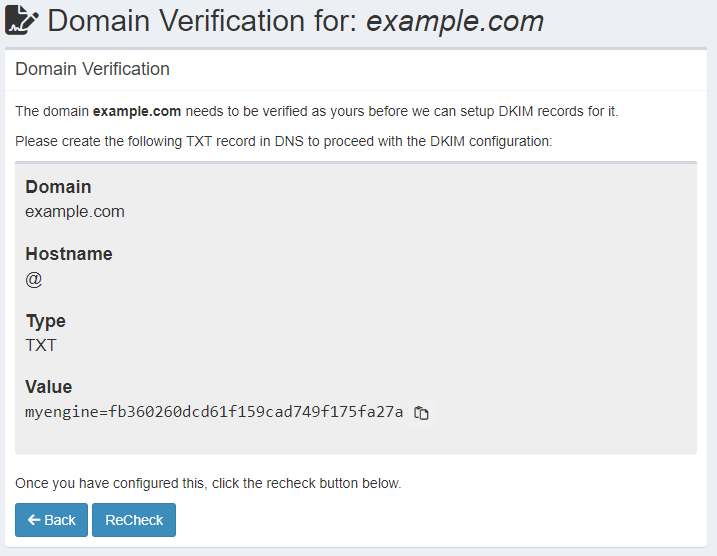
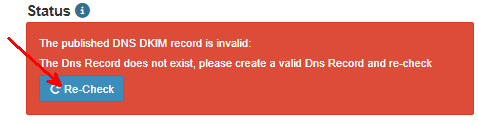
After you have created the TXT DNS record for your domain you can now click the button "ReCheck"
![]()
If updating DNS takes a while then you can always return to the dashboard at a later stage and click the Verify button there.

7) Now the domain is verified the dashboard should now look like the below

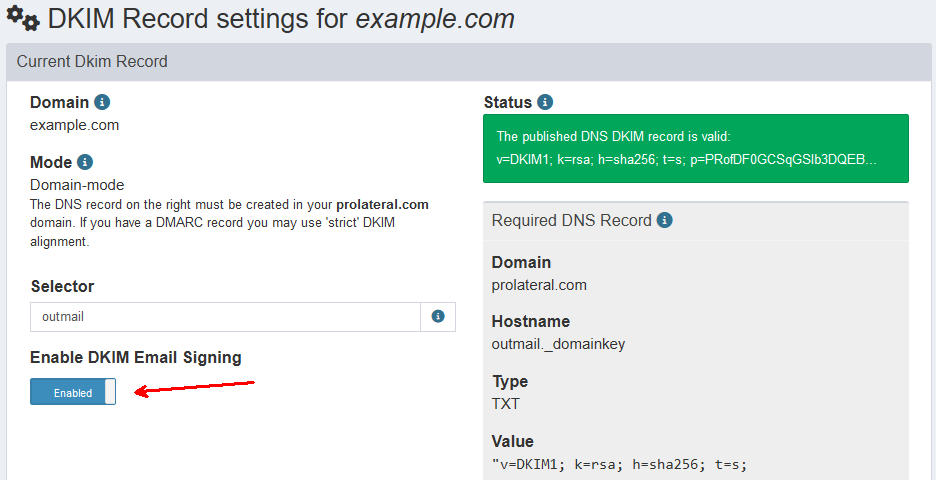
8) Now click on the "Settings" button to reveal the DKIM key and also the public DNS record to add.
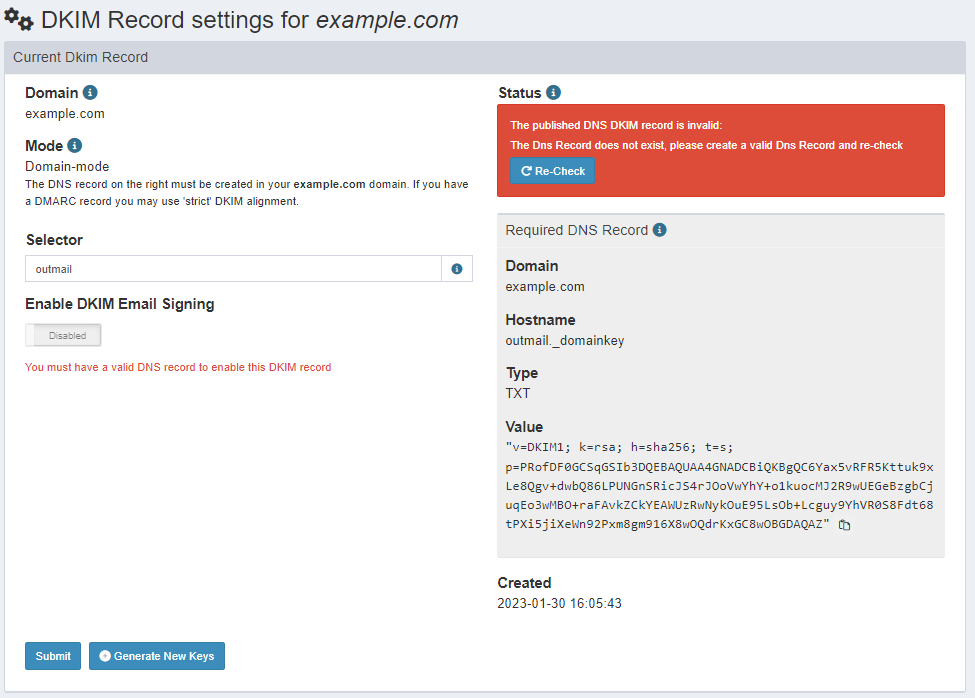
e.g.
outmail._domainkey TXT "v=DKIM1; k=rsa; h=sha256; t=s; p=PRofDF0GCSqGSIb3DQEBAQUAA4GNADCBiQKBgQC6.........."
After you have created the TXT DNS record for your domain you can now click the button "ReCheck".
Note, In this example we left the selector at the default "outmail". If you change the selector then remember the corresponding DNS TXT must match the selector name you've entered.
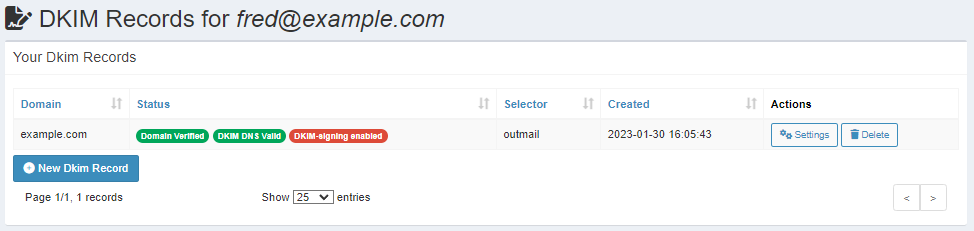
9) If DKIM has been created successfully then the dashboard view will look like the below
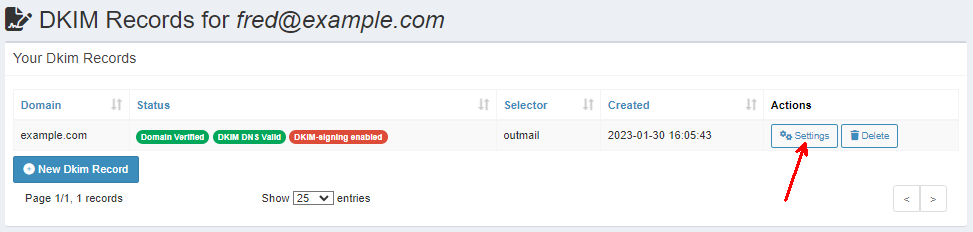
10) In order to enable outMail to now sign the emails with the newly created DKIM records you need to enable it.
Click on the "Settings" button
11) Toggle the "Enable DKIM Email Signing" switch, and click the "submit" button
12) When you return the dashboard the DKIM record well now look like below.
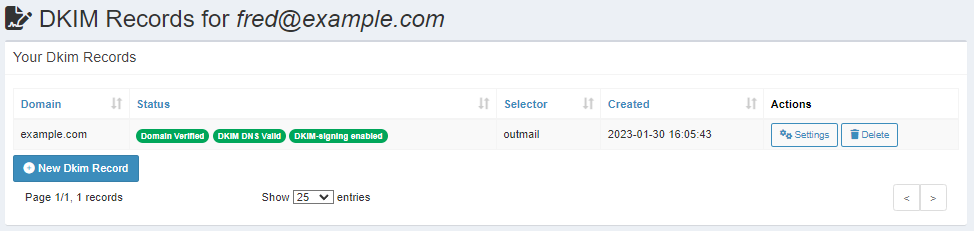
outMail will now automatically DKIM sign all outbound emails for this domain name (example.com) going through the outMail gateway.
If you need to stop DKIM signing of emails then go back into the "settings" and toggle the "Enable DKIM Email Signing" switch to disabled, and click the submit button