Problem
How do I configure outMail as a send connector in Office365?
How do I configure outMail as a send connector in Hosted MS Exchange 365?
How do I configure outMail as a send connector in Microsoft 365?
How do I configure outMail365?
Solution
Follow the guide below to configure outMail as a send connector for Microsoft's hosted exchange 365 / office 365.
It is assumed you already have the following :-
- A working office365 environment
- An active outMail service
Outmail365 allows you to use an existing Outmail account to send out email from your own domains on Microsoft365/Office365 hosted Exchange.
In order to use Outmail365 - you need to add your sending domain to the Outmail account under Outmail365 settings, and then configure your Microsoft365/Office365 Exchange to use the information provided. Outbound email will then go out via your selected Outmail account - providing you with the easy visibility and log tracking that Outmail provides.
Step 1 - Add your domain as an Outmail365 domain
First we will add your domain(s) to the Outmail account in order to allow us to associate outbound email with the correct account.
You will need:
- An existing Outmail account
- Access and ability to amend the DNS records for any domains you wish to use.
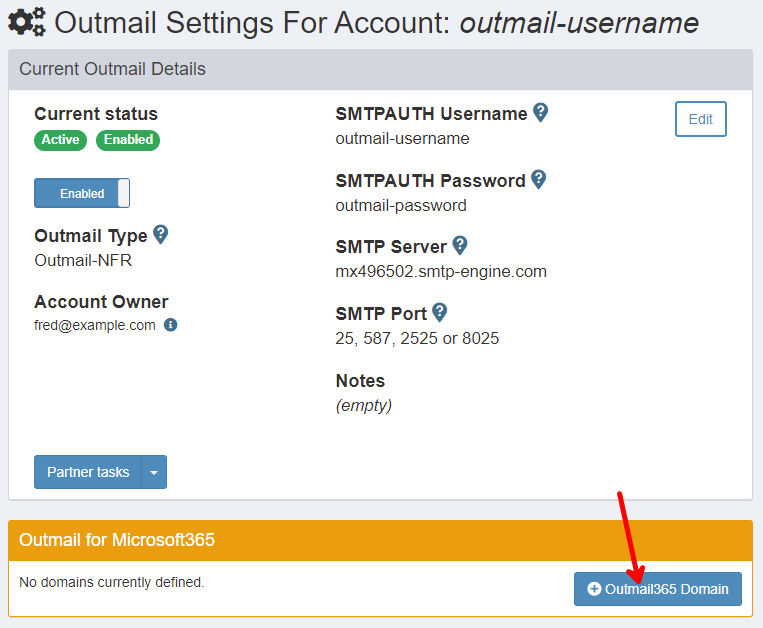
Goto the settings page of your existing Outmail account and click the +Outmail365 Domain button:
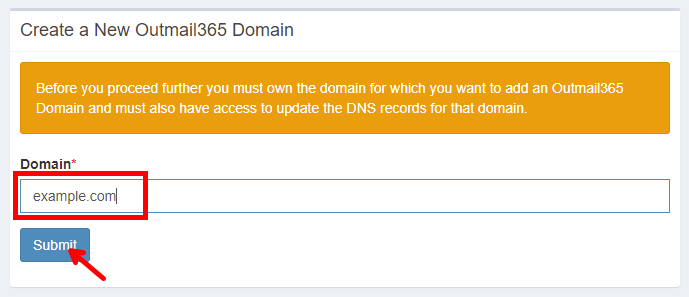
Enter the domain from which you'll be sending email. Note You will need to be able to amend the DNS records for this domain in order to verify ownership:
The record will be created and the details of the DNS TXT record that is required will be displayed.
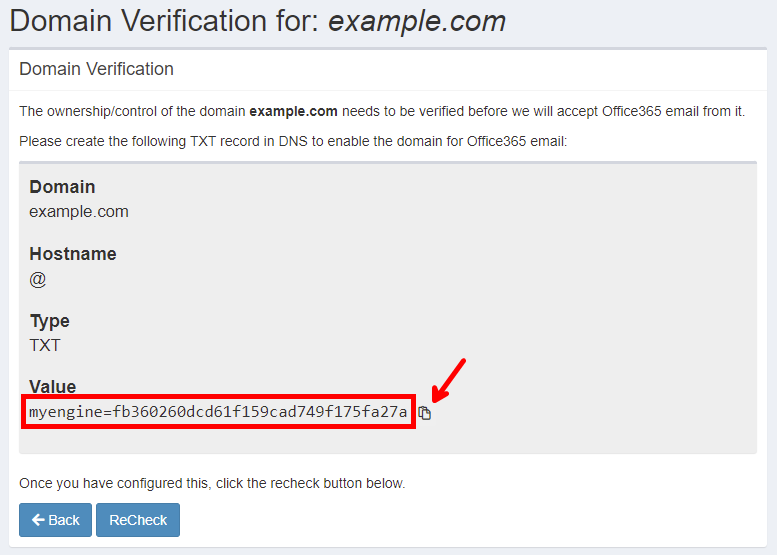
At this stage you will need to login into the DNS control panel for your domain.
Login to your domain's DNS control panel and add the TXT record to the top level of the domain. We can't show examples of this stage because there are so many DNS control panels, we simple couldn't cover them all.

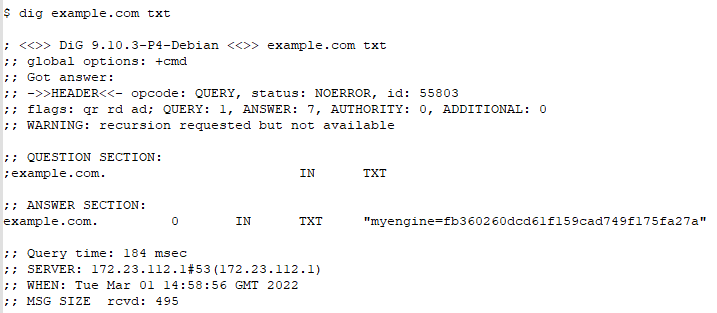
Once the DNS changes have been made and rippled out an example output from the Unix command dig shows the TXT record as it should appear:
Once you have created the DNS record, you can click the ReCheck button to tell the system to verify your domain.
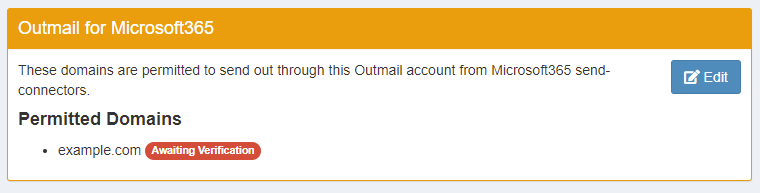
If you need to return to this screen later, you can return to the Outmail Settings page for your account, and you will see any domain(s) awaiting verification:
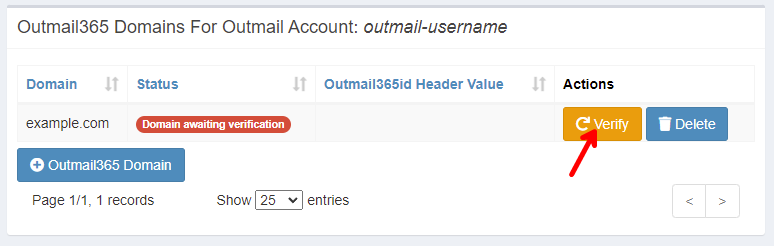
Click on the Edit button and then click on the Verify button to return to the DNS verification page:
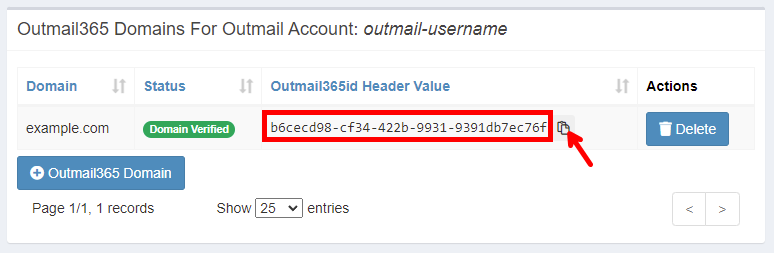
Once the required TXT record has been created and is visible to the server, the list of domains, will show Verified and will provide a Outmail365id Header Value. This Header must be inserted into email being sent by your Microsoft365/Office365 Exchange server in order to allow Outmail to verify and identify outbound email from your domain.
Copy the Outmail365id Header Value as you will need it when you configure Exchange
Step 2 - Creating the Connector in Office365
We will now create a Send Connector on your Microsoft Tenant to direct outbound email through your Outmail account.
You will need:
- Complete Step 1 above
- Global or Exchange admin rights to your Microsoft365/Office365 tenant
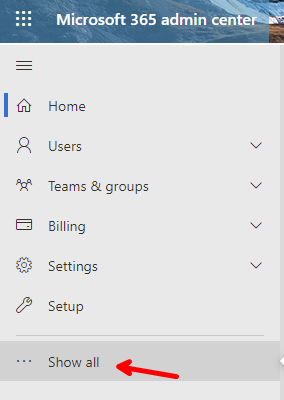
Login to your Microsoft365/Office365 Tenant at https://office.com and open the Admin tool:
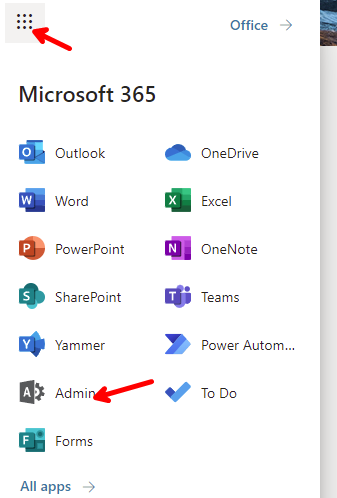
You will need to expand the menu using Show all to access the admin tools:
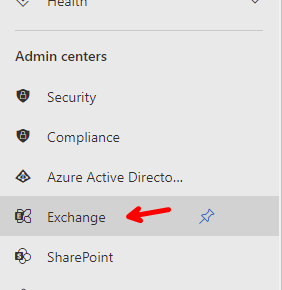
Click the Exchange admin tool:
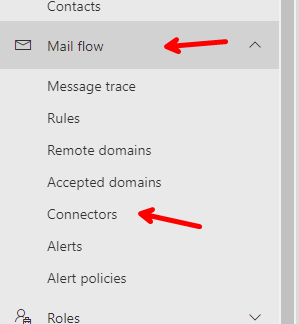
Once it has opened, click the Mail flow menu to expand it, and then click Connectors:
IMPORTANT NOTE: If you already have a Send Connector with the address space set to '*', you will need to temporarily disable it to allow the new Send Connector to be used during the (mandatory) validation process later on.
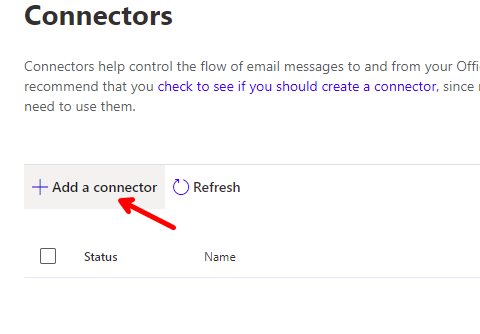
Click the + Add a connector button;
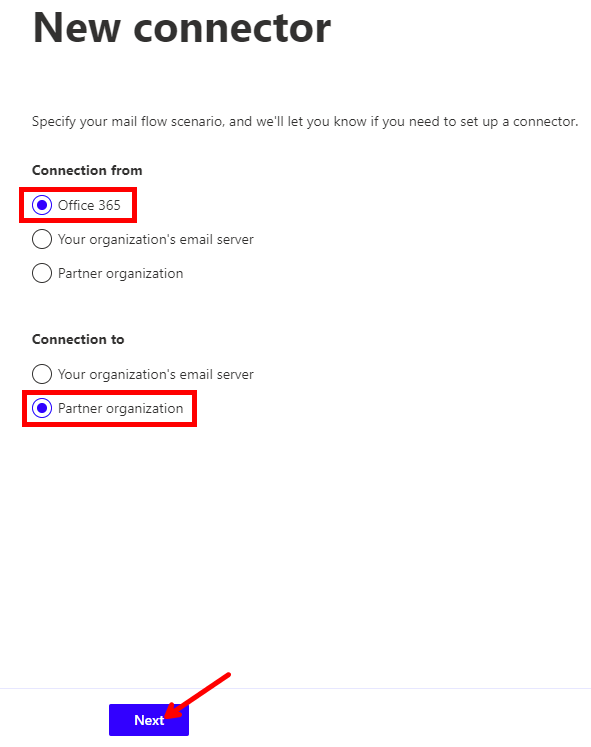
In the New connector panel, select Connection from Office365 and Connection to Partner organisation, then click Next:
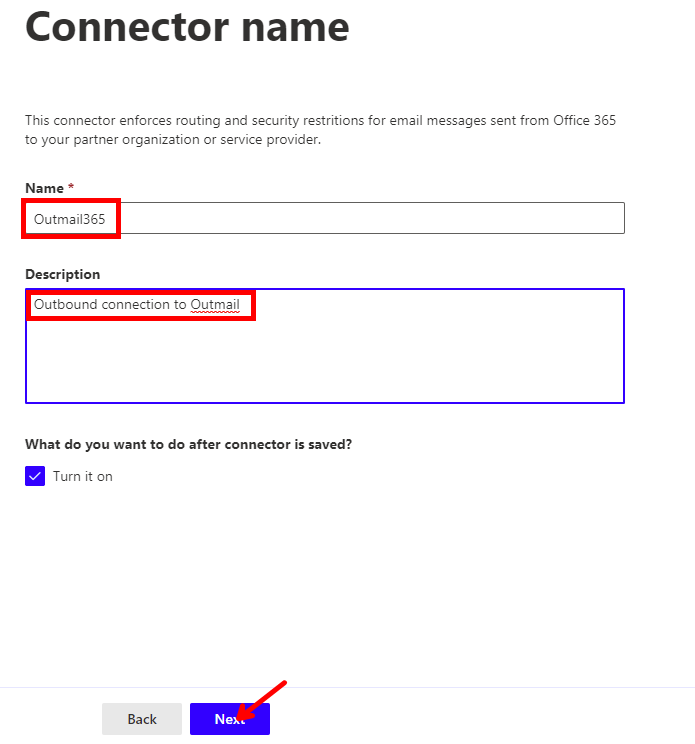
Enter a name for the connector (e.g. Outmail365) and add any description to explain its use, then click Next:
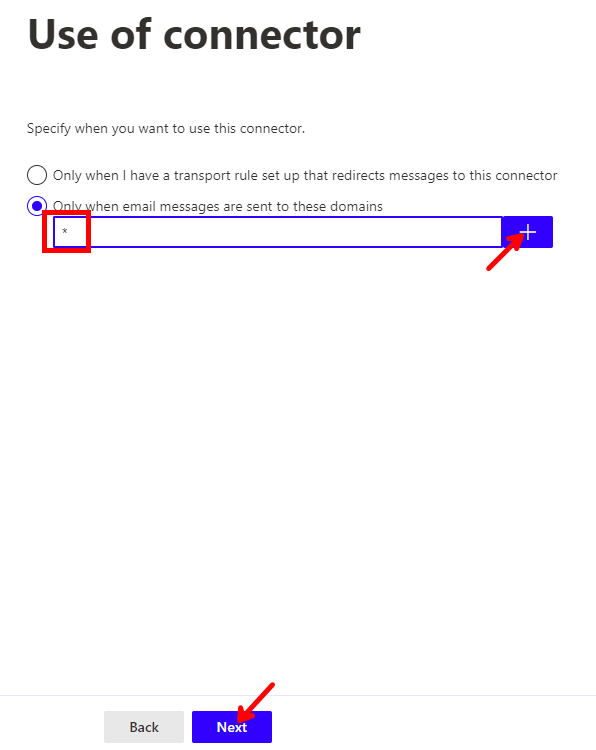
Assuming all your outbound email will be going via Outmail, enter * into the domains box, and click the + to add it to the list, then click Next:
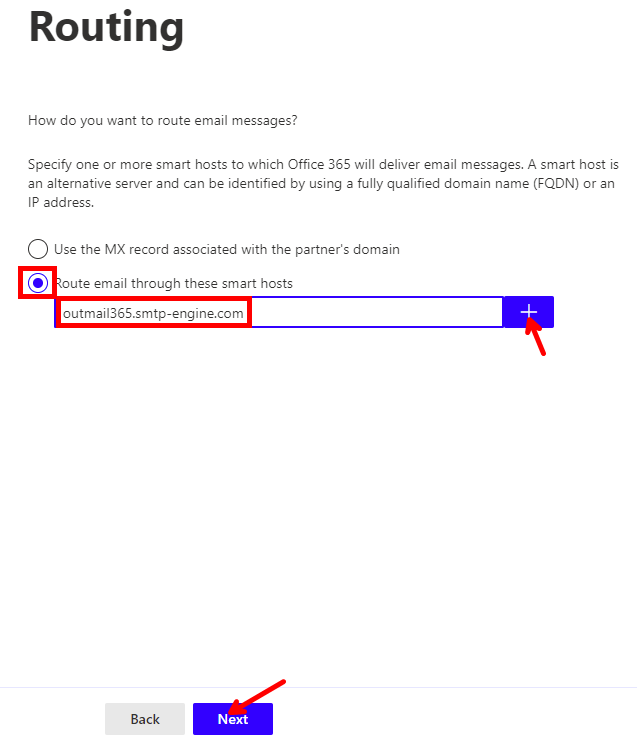
Select to send through the smart host, and enter outmail365.smtp-engine.com and click + to add it to the list, then click Next:
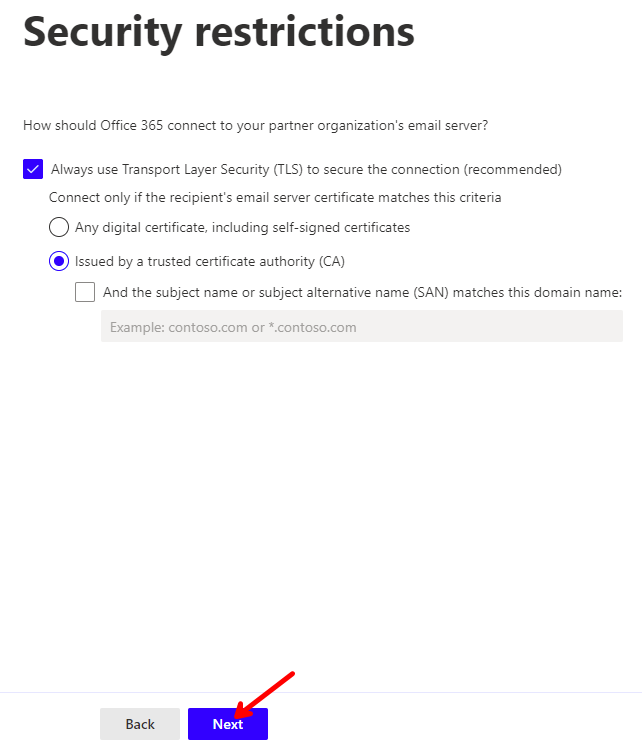
On the Security Restrictions page, leave all settings as default (pictured) and click Next:
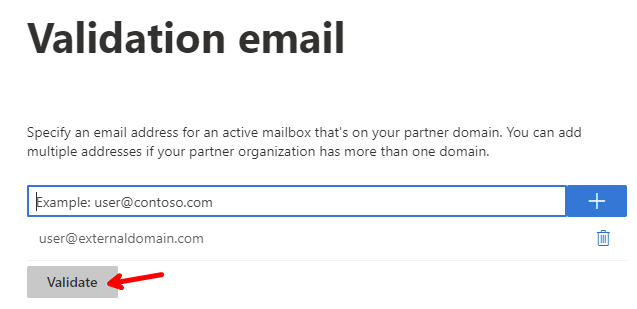
Enter a valid, but external email address in order to allow the system to generate a test - click the + to add it to the list. Once it's in the list, click the Validate button:
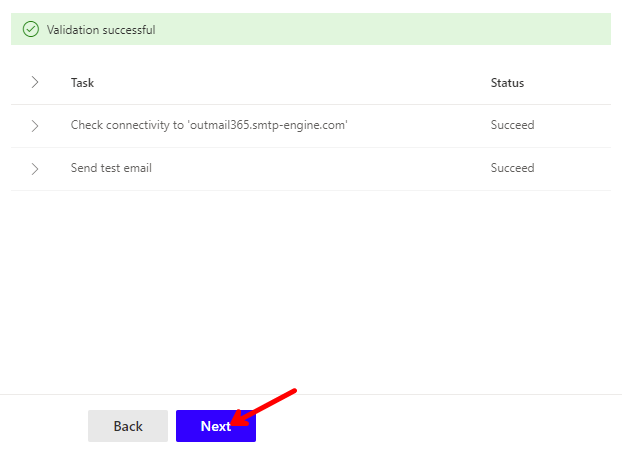
The page will show a Validating progress spinner, and then finally show that the validation was successful. Once it has completed, click Next:
If validation fails please see the section below labelled "Problem Solving"
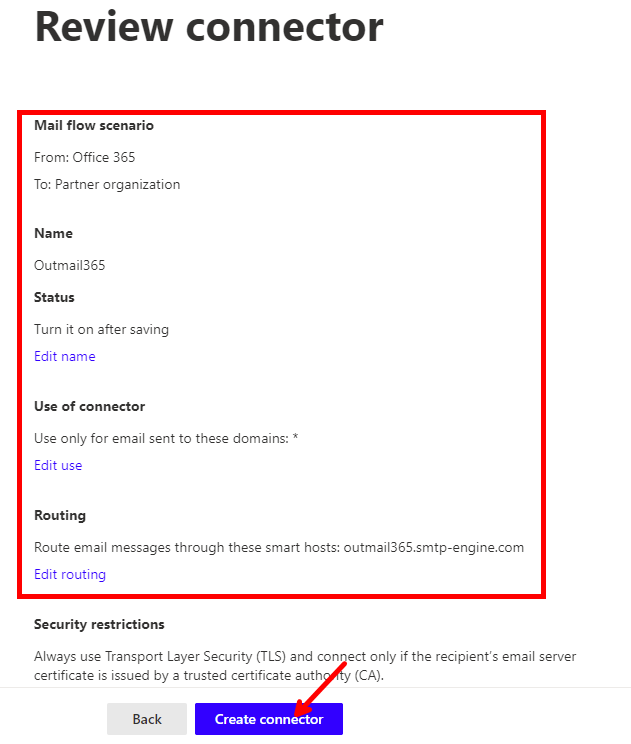
Check all the items on the Review Connector page look correct, and click 'Create connector':
Step 3 - Create Rule to identify email with your Outmail account
You will need:
- Complete steps 1 and 2
- The Outmail365id Header Value from your Outmail Account configured in Step 1
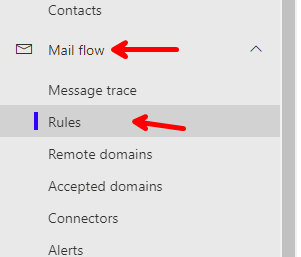
Return to the Exchange Admin tool if you aren't already there, and click the Rules menu
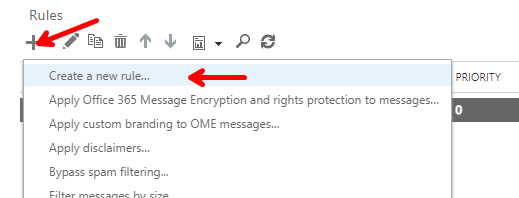
Click on the + to add a rule and click Create a new rule... to add a custom rule:
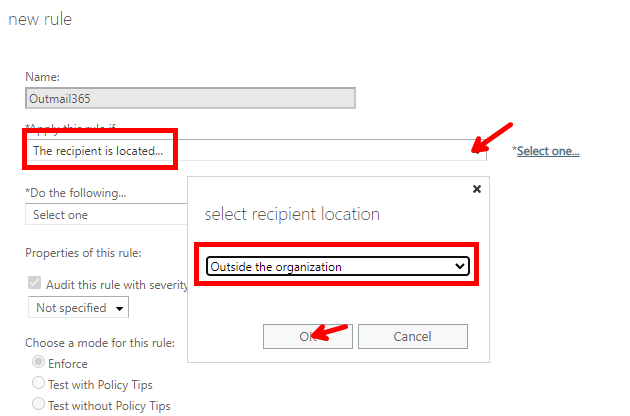
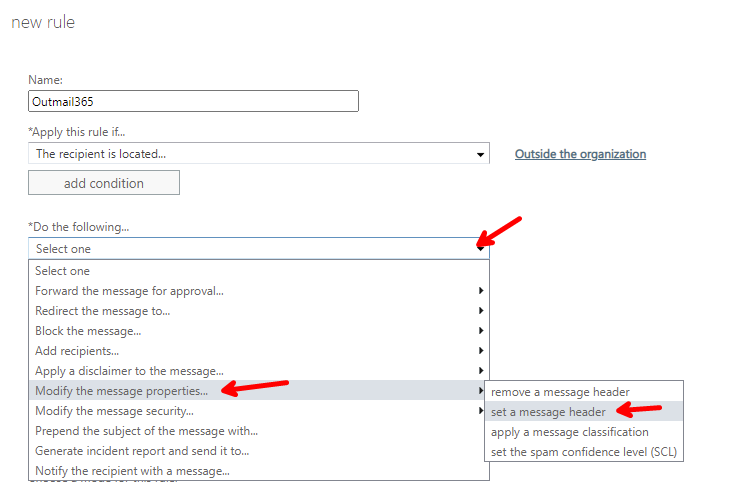
Provide an appropriate name for the rule (e.g. Outmail365) and select The recipient is located... by clicking the drop-down arrow. Select Outside the organization in the pop-up box and click OK:
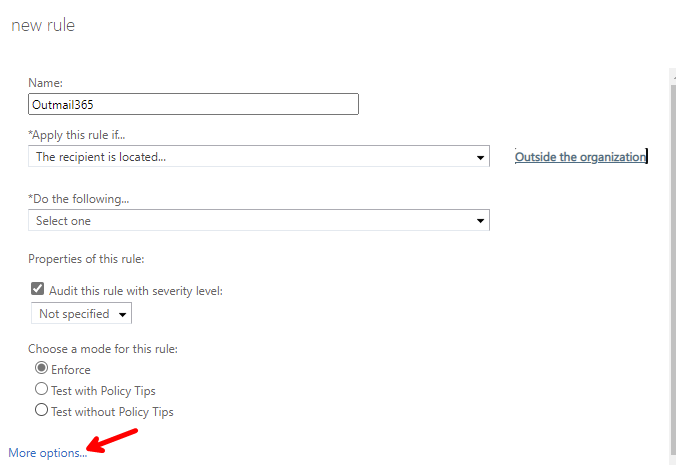
Back in the new rule window, click the More options... to allow us to access the necessary options. The page will update:
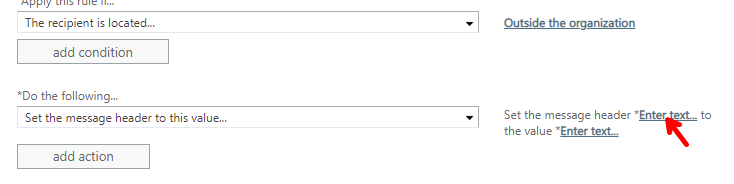
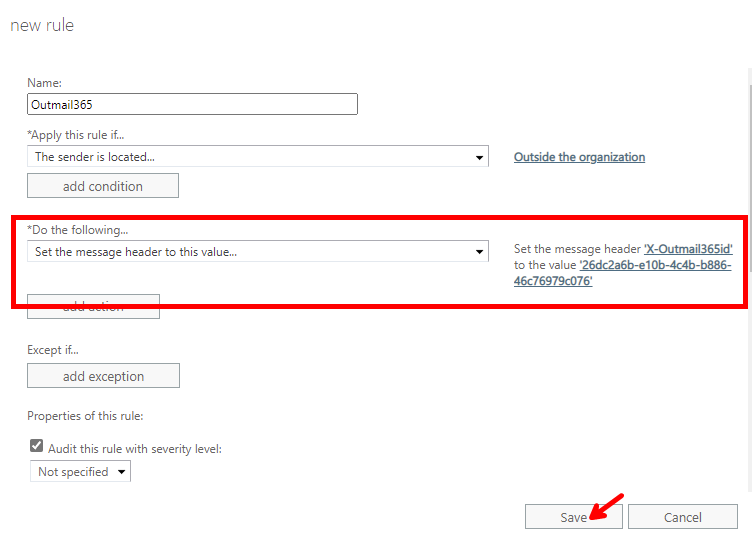
Once the page has updated, you can click on the drop-down arrow on Do the following... and select Modify the message properties... and then set a message header:
Once you have chosen to set a message header, click on the first Enter text... link:
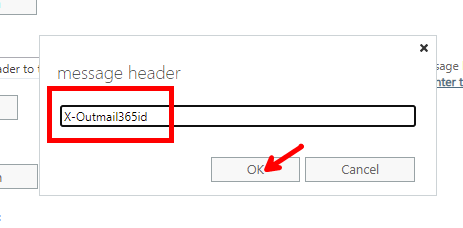
In the message header box enter X-Outmail365id - this is not case-sensitive - and click OK:
Back in the new rule window, click the second Enter text... link:

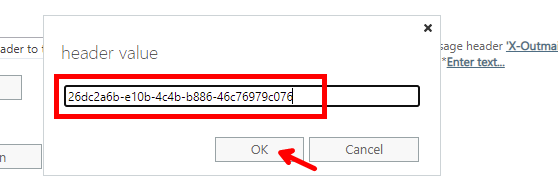
In the header value box paste the Outmail365id Header Value that you were given in Step 1, and click OK:
The new rule page should now contain the fields as shown (with your own ID in it), now click Save:
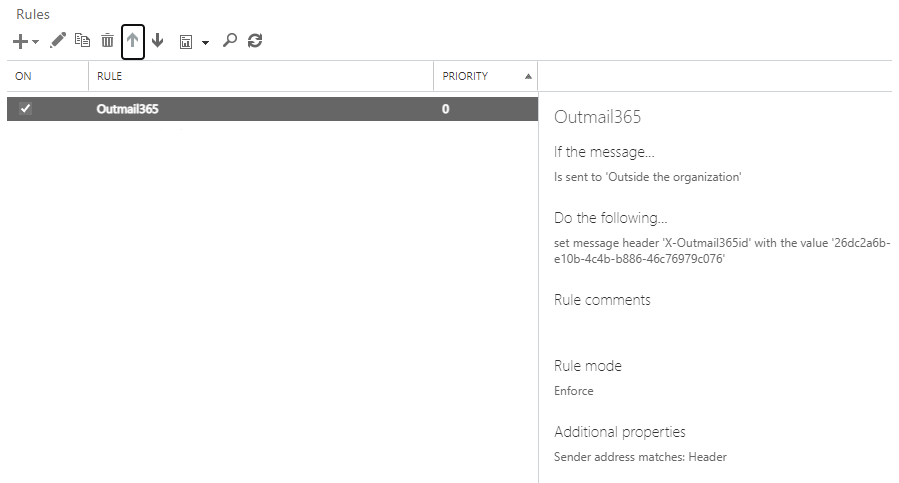
The completed Rule will appear in the rule list, and the correct information should appear in the side panel:
Finish
You have successfully set up your Microsoft365/Office365 account to send out via Outmail. Any email will appear in the logs and statistics as usual.
Problem Solving
Below is a list of common gotchas.
Validation Failed
After you click the validate button you see a failure message similar to below, but you receive the test email.
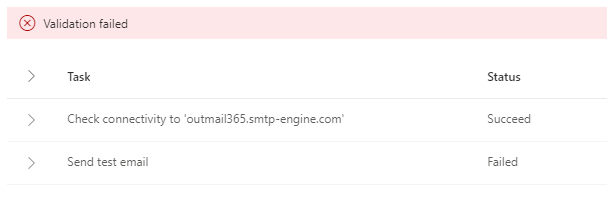
Usually when validating the send connector at this stage we don't expect you to receive the validate email. The fact you did however receive the validate message but validation failed typically means you already have a different send connector already setup with a scope of "*".
You will either need to disable the first send connector or change it's scope before trying to create the outMail365 send connector.
Call To Action - OutMail - For Microsoft365 (Red)
Looking for a send connector for Microsoft 365?
outMail is an outbound SMTP send connector you can rely on, with great customer satisfaction.
- Microsoft Hosted Exchange (Microsoft 365)
- Secure SMTP Send Connector
- Support for SPF & DKIM
- Easy setup
What are you waiting for? Give it a try today.
Popup - Outmail - For Microsoft365 - Blue
Support - outMail365 - Uninstall
Uninstalling / Removing outMail365
To prevent mail flow from Microsoft 365 Exchange to outMail you need to complete the following
- Remove the Send Connector created for outMail365
- Remove the Mail Flow Rule which contains the header rule
- Remove the domain information from the outMail Settings
- Cancel your outMail service if you're not using it for any other forms of sending emails