Problem:
How to setup Microsoft Office 365 in the Exchange Admin Center & Microsoft Defender 365 to support Profilter for email delivery.
NOTE - THIS ARTICLE HAS BEEN UPDATED TO CORRESPOND WITH RECENT MICROSOFT CHANGES (March 2024) TO CONNECTORS
Prerequisite:
It is assumed you have already setup your profilter package and then you have configured profilter to deliver good emails (ham, i.e. not spam) to server address given to you by Microsoft.
It will look something like the below:
example-com.mail.protection.outlook.com
You need to be logged in with a Microsoft365 account with global-admin rights for the relevant tenant. (NOTE - the steps below are not currently accessible as a "delegated admin")
Solution:
Microsoft's information on best-practice for this configuration can be found at this webpage.
Here is a profilter-specific summary:
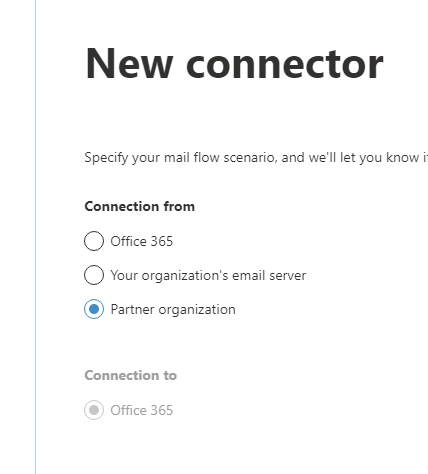
Step 1 - Create an 'inbound' connector
-
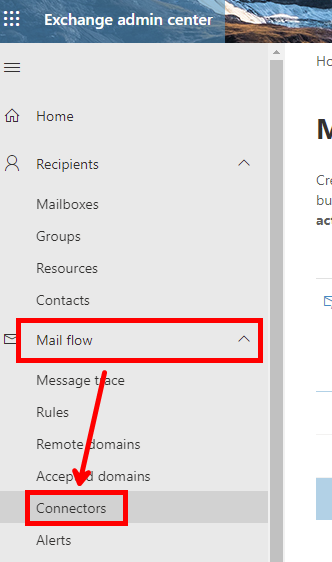
Log in to the Office 365 admin center, and go to Admin centers > Exchange
- Click on Mail flow > Connectors
- Click on + Add a Connector
- Under 'Connection from', click the Partner organization radio-button. Then click Next
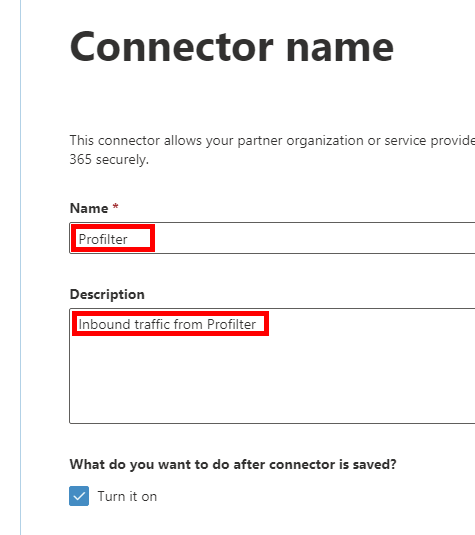
- Enter a name and description for the new connector. Then click Next
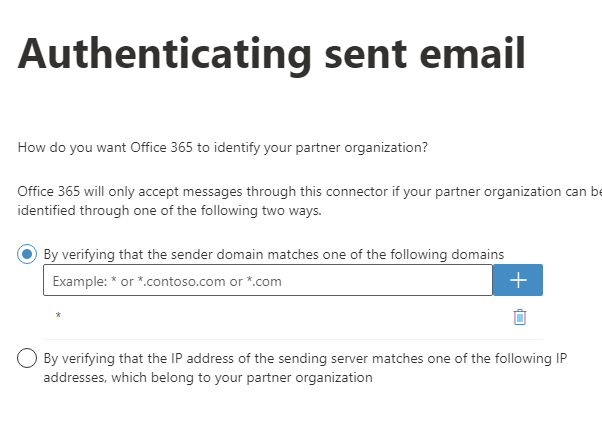
- Enter a single * into the box, and click '+' to add it. Then click Next
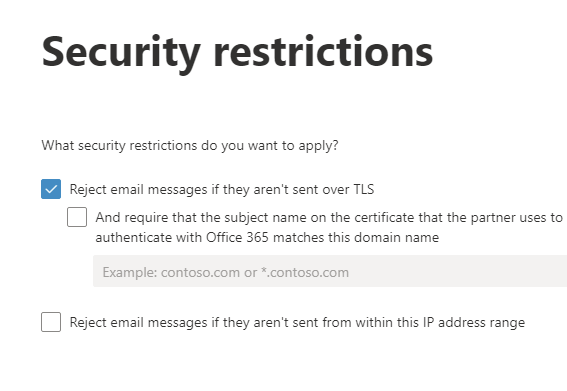
- Leave the 'Reject email messages if they aren't send over TLS' ticked. Then click Next
- Review the settings to ensure they are as below. Then click Create connector
Step 2 - Ensure that Profilter IP address are added as exceptions
You now need to ensure that Exchange Online Protection understands that email received from Profilter via your new connector are valid emails.
You will need the current Profilter IP addresses which can always been found in the list of profilter IP cluster addresses
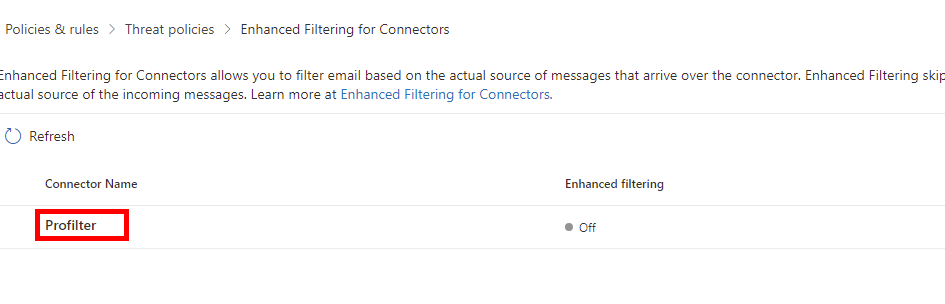
- As a global-admin Go to Microsoft Defender365 (https://security.microsoft.com)
- Navigate to Email & Collaboration > Policies & Rules > Threat policies page > Rules section > Enhanced filtering. (Alternatively you can get there immediately using https://security.microsoft.com/skiplisting )
- You should see the connector you configured previously. Click on the name to edit it.
- In the pane on the right-hand side, select 'Skip these IP addresses...' and enter each IP address from the list of profilter IP cluster addresses. Press ENTER after each one and ensure they are added to the list.
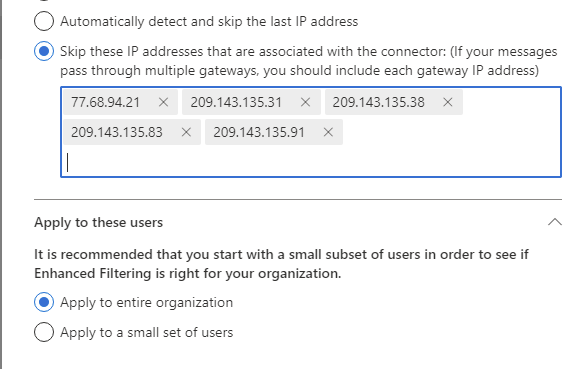
Please see the Knowledge Base Article, Profilter IP Addresses, for the current list of IP addresses. - Click Save
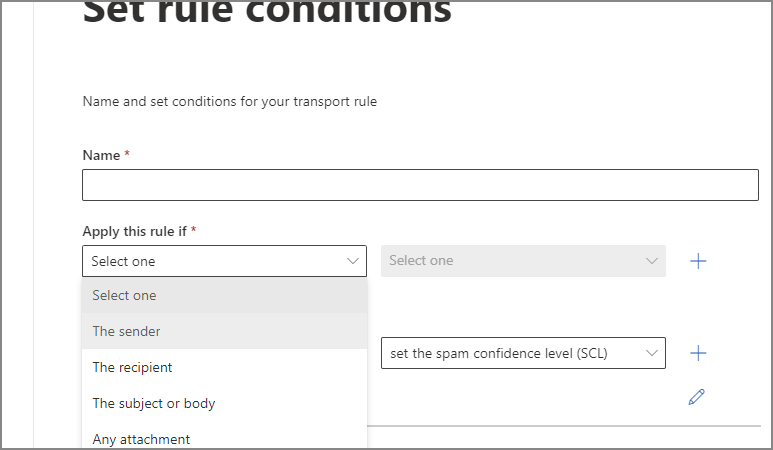
Step 3 - Create a rule in Exchange to bypass Spam Filtering for messages from Profilter
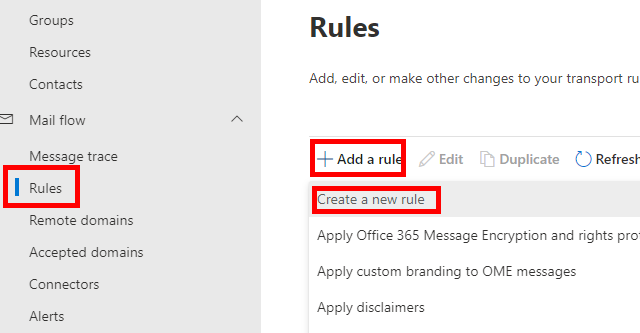
- In the Exchange Admin Centre, in the left pane, click mail flow, and click rules.
- Click +Add a rule and click Create a new rule:
- In the New transport rule page, enter a Name (e.g. Profilter Bypass) to represent the rule.
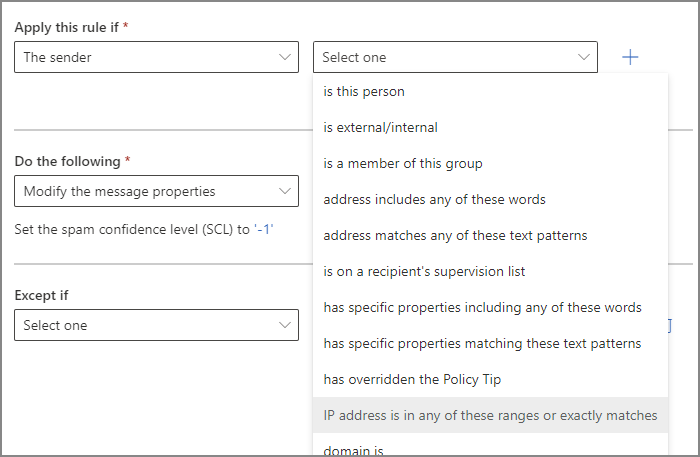
- From the Apply this rule if drop-down menu, select The sender
- In the adjacent Select one drop-down list, select IP address is in any of these ranges or exactly matches
- In the specify IP address ranges panel, enter the IP address for the Profilter Clusters, clicking Add after each one to ensure they appear in the list.
Please see the list of the IP addresses for the Profilter Clusters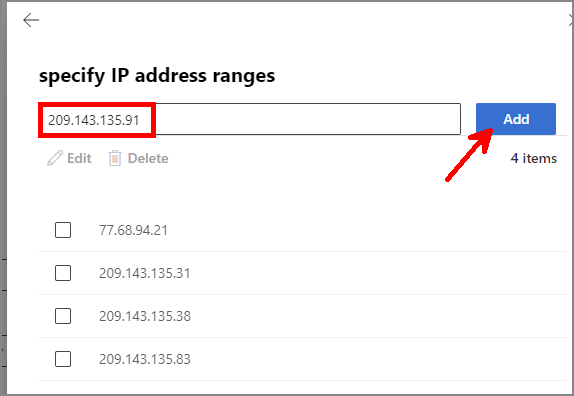
- Click Save to create save and close the IP address ranges panel.
- In the Do the following section select Modify the message properties.

- In the adjacent drop-down box, select Set the spam confidence level (SCL)
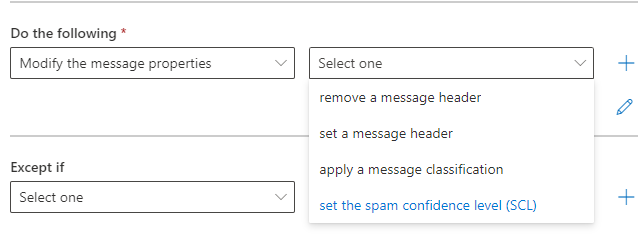
- A panel will appear at the side titled "specify SCL", select Bypass spam filtering
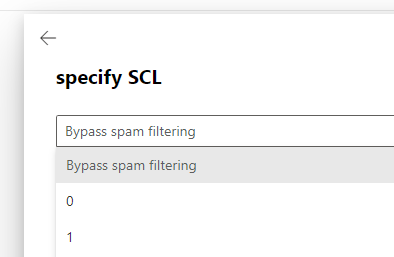
- Click Save to close the panel.
- Click Next to move to the next step - Set rule settings
- Change the Severity field to Not audit - you can select something else if you wish to see them in reports.
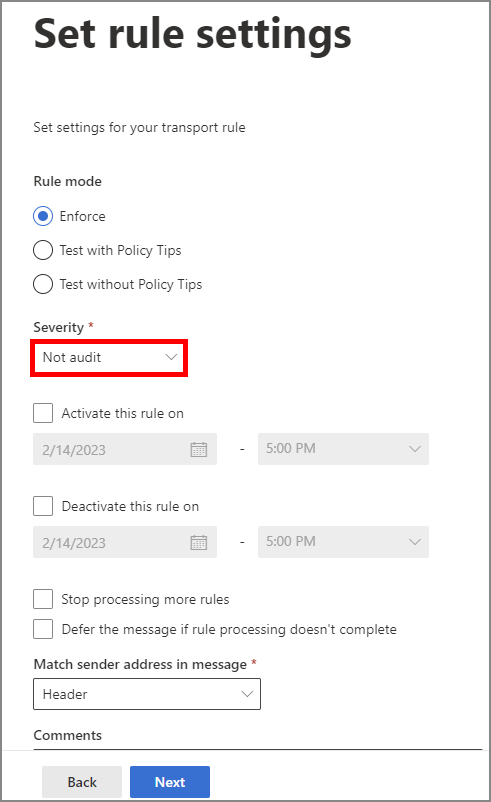
- Click Next to move to the next step - Review and finish
- Click Finish to complete the process - click Done when it says the Transport rule has been created successfully.
- Once the list of Rules shows, the new rule will be shown as Disabled - click on the Disabled status to edit the rule
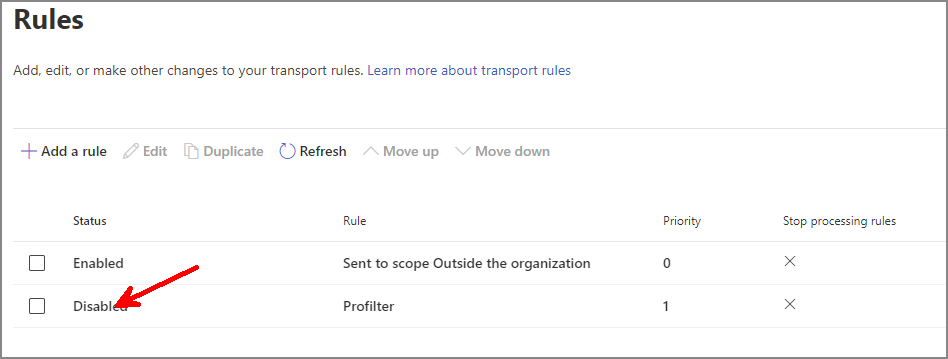
- The side panel will open - click the switch under Enable or disable rule and the rule will update immediately.
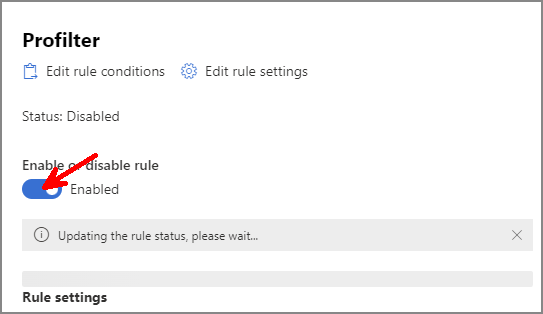
- Once it indicates it has successfully updated, close the panel with the X.
- The rule should now show as Enabled